
A few years ago, I was working on an important project when my laptop keyboard completely stopped responding. I panicked, thinking I might have to replace the entire keyboard or even buy a new laptop. But after troubleshooting, I found that the issue was just a loose ribbon cable inside the laptop. Reconnecting it fixed the problem instantly, saving me time and money. That experience taught me how to diagnose and fix laptop keyboard failures effectively.
A non-working laptop keyboard can be frustrating, especially when you need to complete urgent tasks. This issue can stem from hardware failures, driver conflicts, or software glitches. Sometimes, dirt and debris can block key presses, or a simple software update can cause the keyboard to stop responding.
Unlike desktop keyboards, laptop keyboards are built into the system, making repairs a bit tricky. However, most issues can be fixed with basic troubleshooting steps such as cleaning the keys, updating drivers, or reseating the keyboard connector inside the laptop.
This guide will provide a step-by-step troubleshooting process with detailed explanations of how to use each tool properly, ensuring a beginner-friendly repair experience.
2. Understanding the Issue
Before attempting any fixes, it’s important to determine whether the issue is hardware-related or software-related.
Common Causes of a Laptop Keyboard Not Working:
- Software Issues: Outdated or corrupt drivers, Windows updates causing conflicts, or incorrect settings.
- Physical Damage: Liquid spills, key breakage, or internal component failure.
- Dirt & Debris: Dust buildup can prevent keys from registering presses.
- Loose Keyboard Ribbon Cable: If the internal connection is loose, the keyboard won’t function properly.
- Faulty Hardware: In some cases, the keyboard may be damaged and require replacement.
By following the steps below, you’ll be able to identify and fix the issue effectively.
3. Prerequisites & Required Tools
| Tool | Purpose | How to Use & Best Practices |
|---|---|---|
| External USB Keyboard | Helps test if the issue is software-related. | Plug into a USB port and check if it works. |
| Soft Brush & Compressed Air | Cleans dust and debris under the keys. | Hold the laptop at an angle and use short bursts of air. |
| Screwdriver Set (Phillips #0, #1) | Used to open the laptop and access the keyboard connector. | Use the correct size to avoid stripping screws. |
| Plastic Pry Tool | Safely removes the keyboard panel without damaging the casing. | Insert gently along the edges and slide. |
| Multimeter | Tests voltage from the keyboard connector. | Set to DC voltage mode and measure pin outputs. |
4. Step-by-Step Fixes
Fix 1: Test with an External Keyboard
✔ Purpose: Determines whether the issue is software-related.
Steps:
- Plug a USB keyboard into one of the laptop’s USB ports.
- Try typing on the external keyboard.
- If the external keyboard works, the issue is likely software-related (drivers, Windows updates, or incorrect settings).
- If the external keyboard does not work, the issue is likely hardware-related.
Fix 2: Restart Your Laptop
✔ Purpose: Refreshes the system and resolves temporary software glitches.
Steps:
- Hold the power button for 10 seconds to force shutdown the laptop.
- Wait 30 seconds, then power it back on.
- Check if the keyboard is now working.
Fix 3: Update or Reinstall Keyboard Drivers
✔ Purpose: Fixes corrupted or outdated drivers that prevent the keyboard from working.
Steps:
- Connect a USB mouse or use the touchpad to navigate.
- Right-click on Start Menu and select Device Manager.
- Expand Keyboards, then right-click on Standard PS/2 Keyboard.
- Select Update Driver and choose Search automatically for drivers.
- If the issue persists, select Uninstall Device, then restart your laptop.
- Windows will reinstall the keyboard driver automatically.
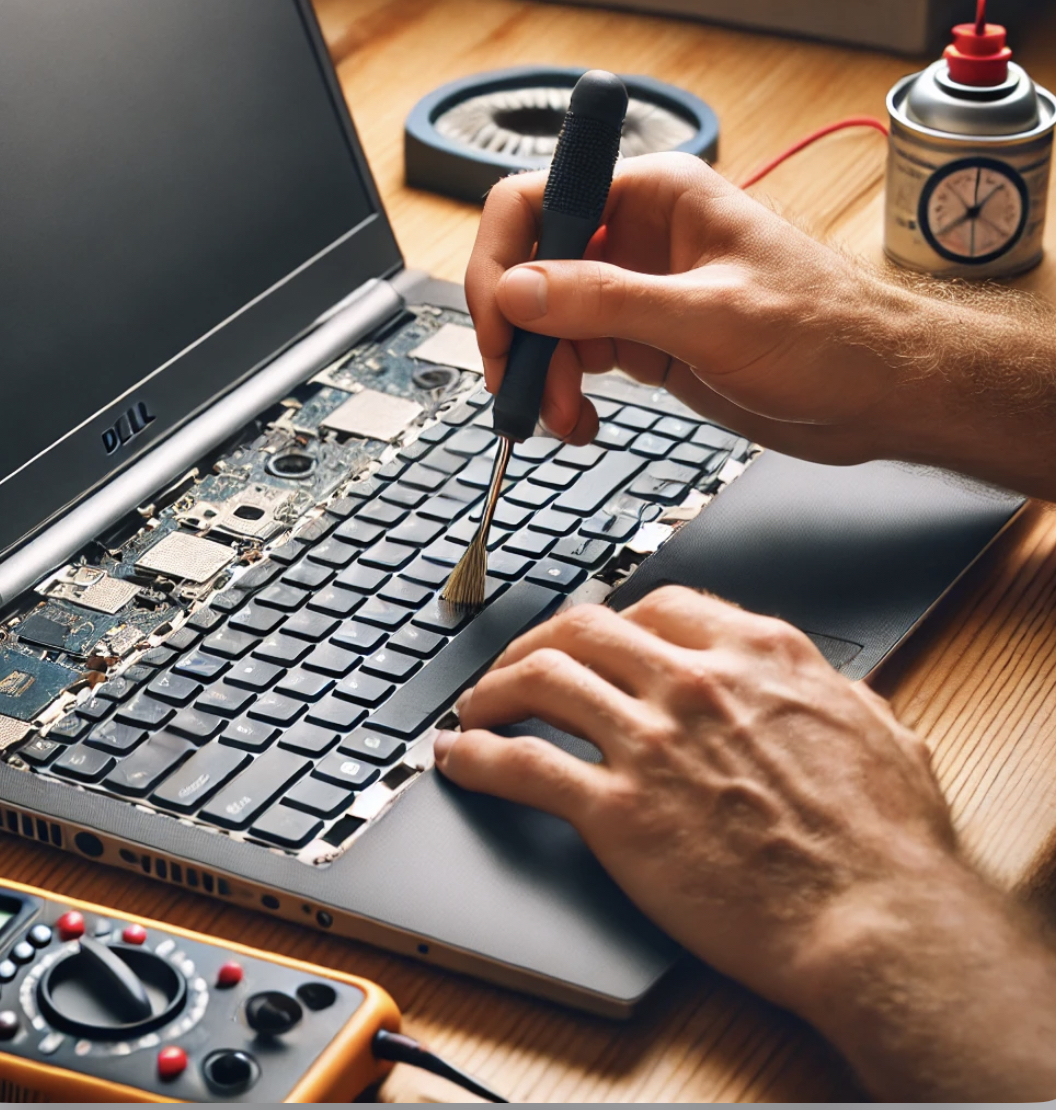
Fix 4: Clean the Keyboard
✔ Purpose: Removes dirt and debris that may be blocking key presses.
Steps:
- Turn off the laptop and unplug the charger.
- Hold the laptop at a 45-degree angle.
- Use a soft brush to remove dust from between the keys.
- Use compressed air to blow out debris (short bursts, holding the fan still).
- Gently tap the laptop upside down to remove loose particles.
Fix 5: Reseat the Keyboard Ribbon Cable
✔ Purpose: Fixes connectivity issues caused by a loose keyboard connector inside the laptop.
Steps:
- Turn off the laptop and disconnect the charger.
- Remove the battery if applicable.
- Unscrew the back panel:
- Use a Phillips screwdriver (#1) to remove the screws securing the keyboard panel.
- Keep the screws organized to prevent loss.
- Detach the keyboard panel:
- Use a plastic pry tool to lift the keyboard panel carefully.
- Do not pull too hard, as it is connected by a thin ribbon cable.
- Locate the keyboard ribbon cable:
- It is a flat, flexible strip connecting the keyboard to the motherboard.
- Reseat the ribbon cable:
- Lift the locking latch on the connector using a fingernail or plastic tool.
- Gently pull out the ribbon cable, wipe its contacts with a microfiber cloth.
- Reinsert it firmly, ensuring it sits straight.
- Push the locking latch back down to secure the connection.
- Reassemble the laptop, insert the battery, and power it on.
- Test the keyboard to see if it now works.
Fix 6: Reset BIOS Settings
✔ Purpose: Fixes keyboard detection issues caused by BIOS misconfiguration.
Steps:
- Turn off the laptop.
- Press the power button, then immediately start tapping F2, F10, or Del (depending on your laptop model) to enter BIOS.
- Use the arrow keys to navigate to Load Default Settings or Reset to Default.
- Save changes and exit BIOS.
- Restart your laptop and test the keyboard.
5. Pros and Cons of Each Fix
| Method | Pros | Cons |
|---|---|---|
| External Keyboard Test | Quickly identifies software vs. hardware issues | Requires an extra keyboard |
| Restarting | Simple and fast | Won’t fix hardware problems |
| Updating Drivers | Fixes software-related issues | Requires a working mouse/touchpad |
| Cleaning Keyboard | Prevents dust-related failures | Won’t fix internal hardware faults |
| Reseating Ribbon Cable | Fixes loose connections | Requires opening the laptop |
| Resetting BIOS | Fixes detection issues | Requires knowledge of BIOS settings |
6. Conclusion & Call to Action
A non-working laptop keyboard can be caused by software conflicts, dust buildup, or internal hardware failures. Start with basic troubleshooting like restarting, updating drivers, or cleaning the keys. If the issue persists, try reseating the keyboard ribbon cable inside the laptop.
Did any of these solutions work for you? Share your experience in the comments below!